
 Nederlands
 Français
 Deutsch


Professional knowledge about tooth gems & crystals
Tooth gems may be small, but professional placement requires knowledge of the tooth surface, adhesion, materials, isolation, curing and aftercare. A good result therefore starts not with the crystal itself, but with a carefully performed bonding protocol.
On this page, X-treme Smile® shares professional knowledge about tooth gems and crystals: from materials and shapes to professional bonding on natural enamel, the function of etch, primer and bonding, and the importance of correct light curing.
What are tooth gems?
Tooth gems are small decorative crystals or stones that are bonded to the visible surface of a natural tooth using a dental adhesive system. With an adhesive placement, there is no need to drill into the tooth.
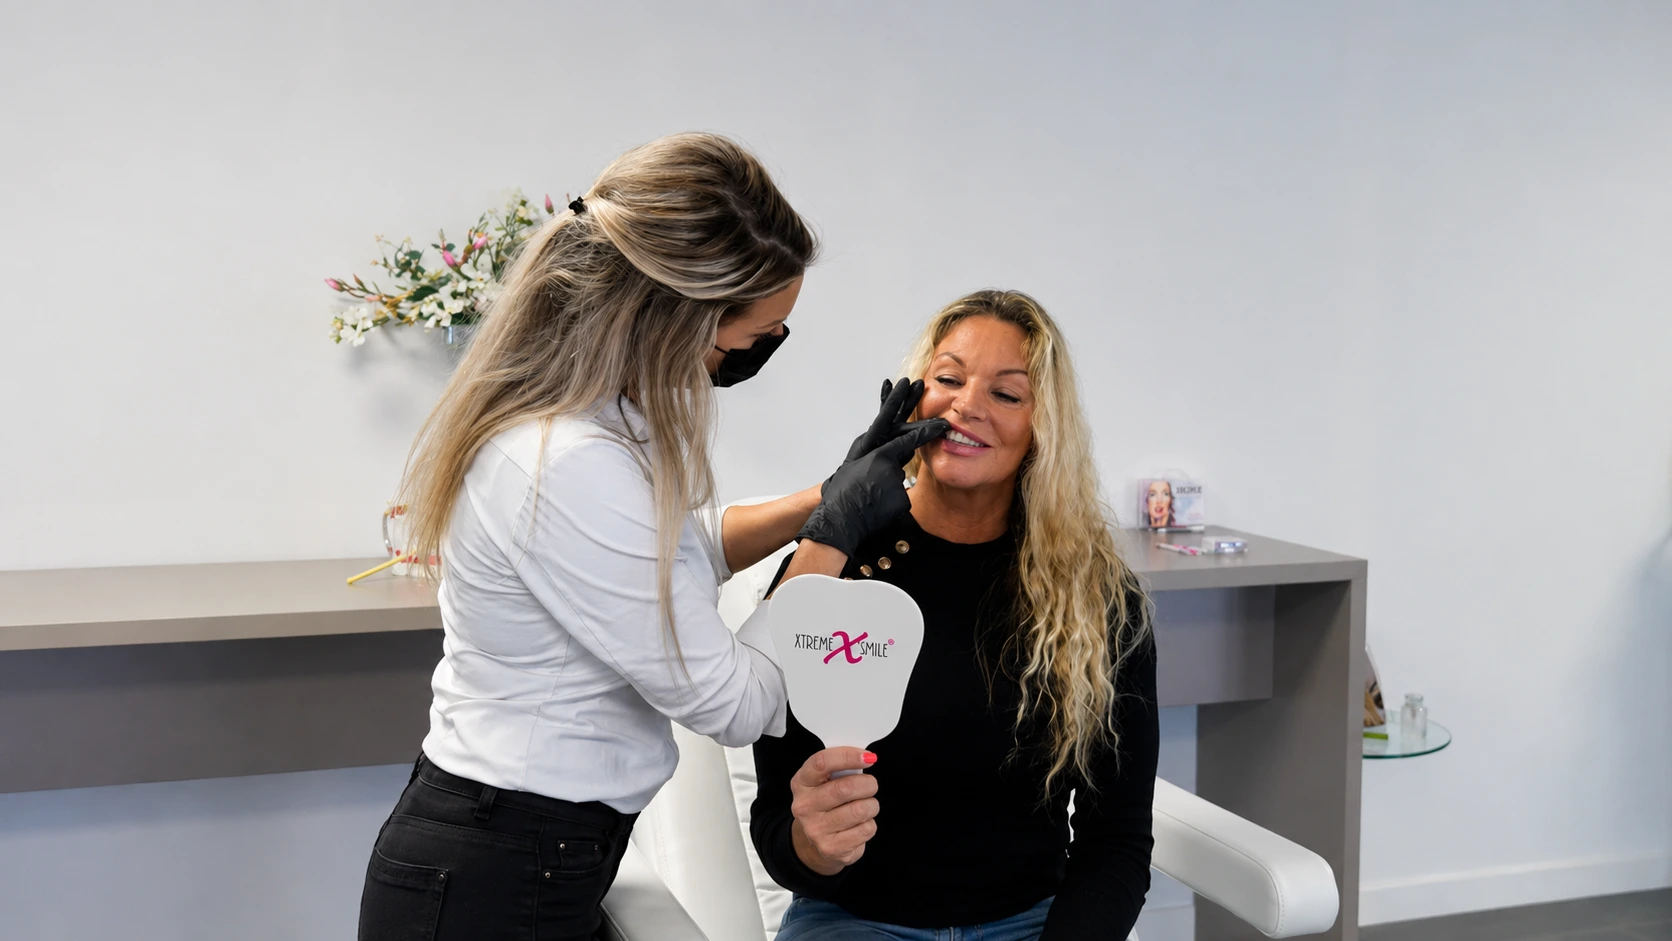
Tooth gems are mainly placed on the visible surfaces of the front teeth. They sit on the tooth surface and are therefore different from a piercing or jewellery that is embedded in tooth tissue.
For placement, the enamel surface is prepared and materials intended for adhesive use on teeth are used. The tooth gem is then positioned in the desired location and the bonding material is polymerised with a suitable dental curing light.
The fact that a tooth gem is small does not make the technique unimportant. Placement quality is strongly influenced by enamel preparation, control of moisture and saliva, the bonding protocol used, crystal positioning and light curing.
Professional tooth gem placement is therefore not simply a matter of “gluing on a little stone”. It is an adhesive technique in which material selection, surface preparation and precise working together determine the result.
What types of tooth gems and crystals are available?
Tooth gems are available in different materials, sizes and shapes. The choice mainly affects the look and design, but size, contact surface and placement can also make a practical difference.
Swarovski® crystals
Swarovski® crystals are used for their precise faceting and strong light reflection. Round crystals are available in several sizes, alongside a range of decorative shapes.
BLINQ® crystals
BLINQ® tooth gems are available in a wide range of colours, sizes and shapes. They can be placed individually or combined in larger tooth gem designs.
Zirconia
Cubic zirconia is a synthetic gemstone with a strong, diamond-like sparkle. In the beauty industry, zirconia is sometimes referred to as a “lab diamond”, but mineralogically it is not a diamond.
Shapes and sizes
In addition to round crystals, shapes include hearts, drops, triangles, squares, rectangles, navettes, stars, moons and butterflies. Different sizes and shapes can be used individually or as part of a design.
And gold tooth jewellery?
Gold tooth jewellery also belongs to the category of decorative tooth jewellery, but forms a separate category. Material, shape, weight, design and placement differ from small crystals. We therefore cover gold tooth jewellery in detail on a separate knowledge page.
Appearance is not the only factor that matters. For professional placement, you also consider the size, shape, contact surface, position on the tooth and how the selected jewellery fits within the complete bonding protocol.
How are tooth gems professionally applied?
Professional tooth gems are adhesively bonded to tooth enamel. The exact steps and processing times vary between bonding systems. Always follow the instructions for use of the system being used.
The basis is a clean and suitable tooth surface, good isolation, controlled surface preparation, a dental bonding system, precise placement and complete curing.
Assess the tooth and placement
Before placement, check whether the selected tooth surface is suitable and determine the position and desired design together with the client.
Clean and isolate the tooth surface
The surface must be clean and kept as free as possible from saliva and other moisture during the bonding process. Good isolation is therefore an essential part of the treatment.
Etch the enamel
Apply the etch only to the intended enamel surface and follow the instructions for the system being used. Rinse thoroughly and dry afterwards. The treated enamel develops the characteristic matt, frosty appearance.
Apply primer or adhesive
Next, apply the primer or adhesive according to the bonding protocol. This forms the connection between the prepared enamel and the subsequent bonding material.
Apply bonding and place the tooth gem
Apply the bonding material in a controlled manner and position the crystal precisely in the selected location. Attention is also paid to a neat finish around the tooth gem.
Cure with a dental curing light
The light-curing material is then polymerised with a suitable dental curing light, following the curing time and instructions for the bonding material being used.
Check placement and finish
After curing, the position, adhesion and finish are checked and the client is given clear oral-hygiene and aftercare instructions.
How does the BLINQ® bonding system work?
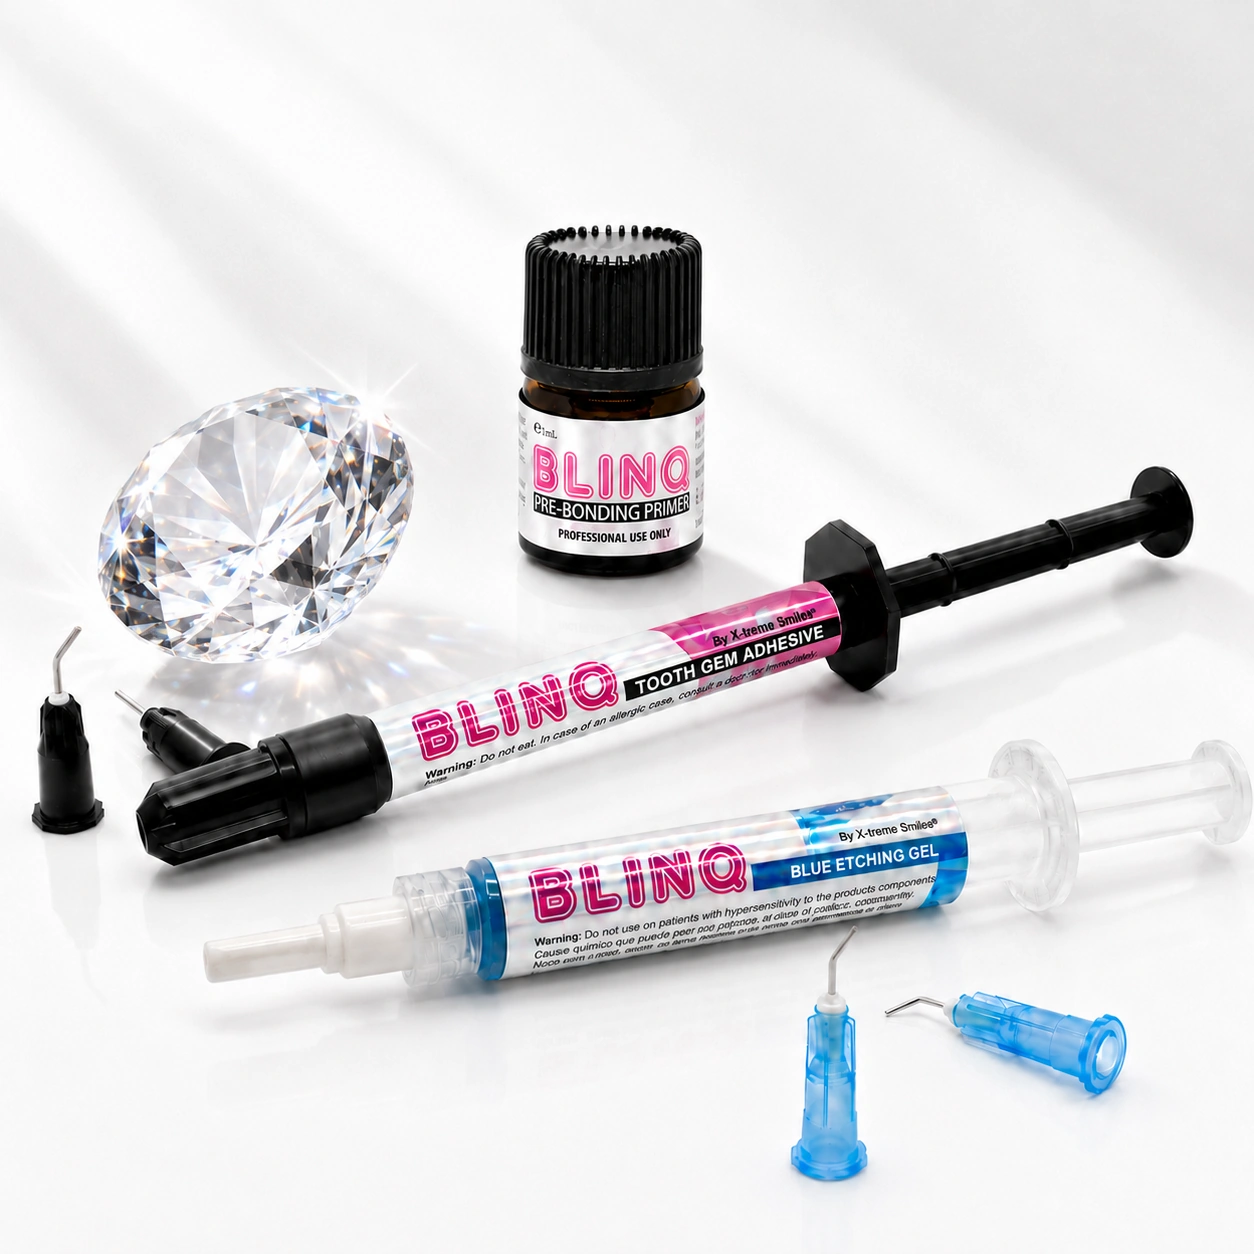
Within the BLINQ® bonding system, the adhesive process consists of three clear product steps: Blue Etch, Primer and Glue. Each step has its own function within surface preparation and adhesion. The products must be used in the prescribed order and according to the corresponding instructions for use.
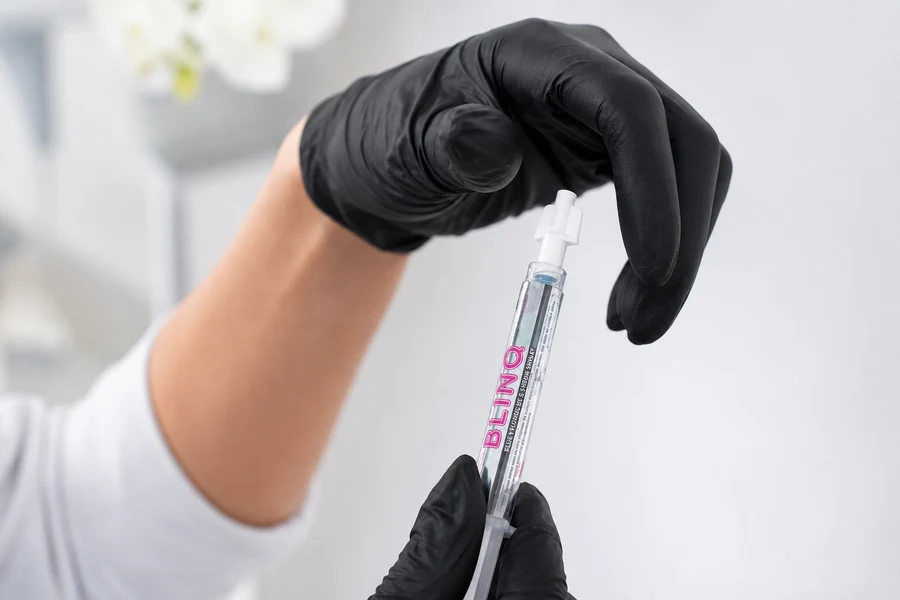
Preparation of the enamel surface.
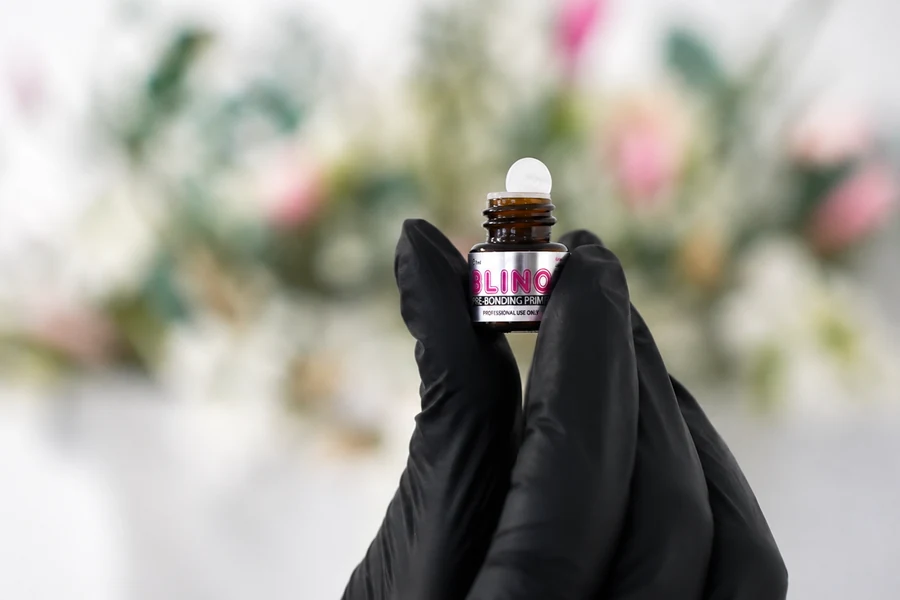
The adhesive intermediate step within the system.
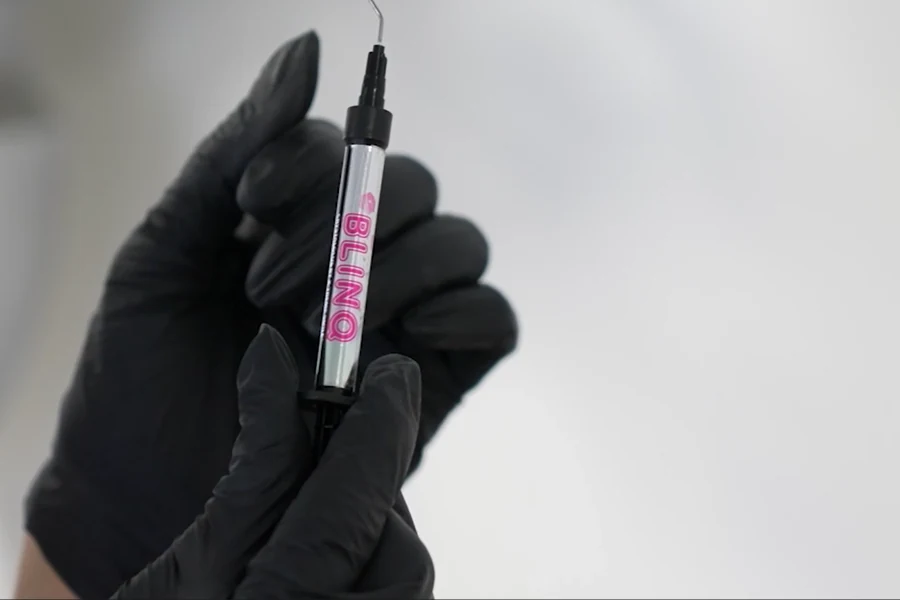
Bonding material used for placement of the tooth gem.
The steps of different dental bonding systems are not automatically interchangeable. Always follow the complete protocol of the system you are using.
What determines whether a tooth gem bonds well?
Good adhesion is not created by one product or one action. It is the result of a sequence of steps that must work together correctly.
Why is saliva contamination so important?
A clean and dry working field is important during adhesive dental procedures. If a prepared surface becomes contaminated with saliva again, this can affect adhesion. Do not simply continue as though nothing has happened.
If contamination occurs, restore the correct working conditions and follow the bonding system instructions for reconditioning the surface. Which step needs to be repeated can vary by product.
Why not use nail glue or superglue?
Tooth gems should be bonded with materials intended for adhesive use on teeth. Nail glue, household superglue and other non-dental adhesives are not developed as professional bonding systems for tooth enamel and therefore do not belong in a tooth gem treatment.
- Use materials intended for the relevant dental application.
- Follow the instructions for use of the etch, primer, bonding and curing light.
- Prevent etch and bonding materials from contacting unintended oral tissues.
- Work hygienically and prevent contamination during the adhesive steps.
The best basis for reliable retention is not “stronger glue”, but a correctly performed adhesive protocol on a suitable tooth surface.
Where is the best place to position a tooth gem?
For a standard tooth gem placement, we preferably work on healthy natural enamel and in a position where the jewellery is exposed to as little load as possible from the bite, lips and hard foods.
Not every area of a tooth is equally suitable in practice. Position affects the appearance of the design, but also the load placed on the tooth gem and therefore the likelihood that it will remain in place.
Healthy natural enamel
The standard tooth gem bonding protocol is designed for adhesive placement on tooth enamel. The surface must be intact, clean and suitable for treatment.
A sufficiently flat contact surface
A tooth gem should fit well against the selected tooth surface. Highly curved areas, edges and very small contact surfaces can make placement technically more difficult.
Take the bite into account
Check that the tooth gem does not come into direct contact with a tooth in the opposing arch when the client bites together. Repeated mechanical loading can affect both retention and comfort.
Not too close to the gum line
When designing the placement, make sure the tooth around the jewellery can still be cleaned properly. An unfavourable position can make plaque and food debris accumulate more easily.
Upper and lower teeth
Tooth gems are often placed on the upper front teeth, but designs on lower teeth are also possible. With lower teeth, it is especially important to assess the bite and available space.
A gem on a lower tooth may, for example, be subjected to mechanical loading sooner from the upper teeth, the lip or during eating. Its longevity in certain positions may therefore be shorter than on a favourably positioned upper tooth.
Crowns, veneers and composite
A crown, veneer or composite restoration has a different surface from natural enamel. A bonding protocol intended for enamel therefore cannot automatically be applied to these materials.
For a cosmetic tooth gem artist, it is sensible to limit a standard tooth gem protocol to suitable natural enamel unless there is demonstrable knowledge, appropriate professional authority and a bonding protocol specifically intended for the relevant restorative material.
The most attractive position is therefore not automatically the best position. A professional considers both design and tooth surface, contact area, bite, cleanability and mechanical loading.
How long does a tooth gem stay on?
It is not possible to predict exactly how long a tooth gem will remain in place. Longevity depends on the combination of placement technique, bonding material, position, bite, oral hygiene, eating habits and aftercare.
Two identical crystals placed with the same bonding system do not necessarily remain in place for exactly the same length of time. Conditions during placement and the load afterwards vary from person to person and from tooth to tooth.
Can a tooth gem come off unexpectedly?
Yes. A tooth gem is adhesively bonded and is not a permanent part of the tooth. Even when the placement has been carried out correctly, the crystal may come off at some point.
This does not automatically mean that the treatment was performed incorrectly. Mechanical loading, bite pattern, the position of the jewellery and the client’s habits can all play a role.
Hard foods and biting directly
A tooth gem is subjected to the greatest load when hard or chewy food comes directly into contact with the crystal. Examples include biting into hard fruit, crusty bread rolls or similar foods that place considerable force on the front teeth.
It is therefore sensible to explain to clients that they should not deliberately bite on, pick at or play with the jewellery.
Professional placement aims for the best possible retention, but a fixed lifespan cannot be guaranteed. Good technique and good aftercare reduce avoidable causes of premature loss.
Which curing light should you use for tooth gems?
For light-curing dental bonding materials, use a suitable dental curing light. It is not only the amount of light that matters: wavelength range, irradiance, exposure time, positioning and compatibility with the bonding material all determine whether the material can polymerise correctly.
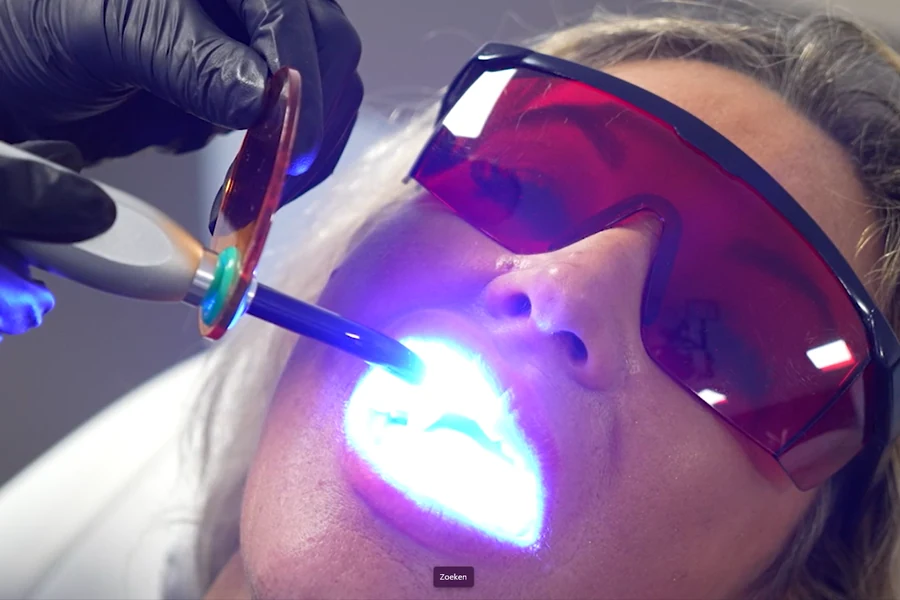
The bonding material used for tooth gems may be light-cured. In that case, the material contains a photoinitiator system that is activated by light within a suitable wavelength range. The curing light provides the energy that polymerises the bonding material and allows it to develop its final properties.
A curing light is therefore not simply any blue light. Professional dental curing lights are specifically designed for polymerising light-cured dental materials.
Light intensity
The amount of light delivered per unit area is generally expressed as irradiance in mW/cm².
Looking only at the electrical wattage of a device therefore says little about how effectively a dental curing light can expose the bonding material.
Wavelength and photoinitiator
Not every light-curing material responds to exactly the same wavelength range. The light source must therefore be compatible with the photoinitiators present in the bonding material being used.
Modern dental curing lights may cover a broad spectrum, but the instructions for the bonding material and the curing light remain decisive.
Distance and angle
The light guide must be positioned so that the light actually reaches the bonding material. As distance, angle or positioning become less favourable, less useful light may reach the treatment area.
For tooth gems, this means carefully directing the light guide at the treatment area and keeping it stable during curing.
Even light distribution
In addition to maximum irradiance, the distribution of light is also important. A good dental curing light should distribute light as evenly as possible across the emitting surface of the light guide.
This helps expose the bonding material around the tooth gem as consistently as possible.
What is the difference between a curing light, whitening lamp and nail lamp?
These devices can all produce visible blue or violet light, but they are designed for different applications.
The fact that two lights both emit blue light does not mean they are interchangeable. For tooth gem bonding, use a light whose output and wavelength range are compatible with the dental material being used.
Does a more powerful curing light automatically mean you can cure for less time?
Not automatically. Light intensity and exposure time are related, but the required curing time also depends on the bonding material, the photoinitiator system, the curing light used and how effectively the light reaches the material.
Some modern dental systems are designed for very short curing times. However, this does not mean that every bonding material can simply be cured for one or a few seconds with any high-powered light.
Always follow the curing time specified for the combination of bonding material and curing light being used. A shorter exposure time is only appropriate when the relevant system has been designed for it.
How long does a curing light last?
The practical lifespan of a curing light can vary considerably. From our experience with professional tooth gem use, we see many curing lights being used for around 6 months to 2 years before the battery, electronics, light guide or light output give reason for replacement.
This is expressly not a guaranteed lifespan. Some lights last considerably longer, while another unit may fail sooner. Quality, frequency of use, charging habits, maintenance, heat, drops or impacts, and simply variation between individual electronic components can all play a role.
Treat 6 months to 2 years as a practical experience-based range for professional use, not as a fixed lifespan that applies to every curing light.
Why can’t you compare the lifespan with that of a whitening lamp?
A teeth-whitening lamp and a dental curing light have very different functions. A whitening lamp distributes light over a relatively large area of the dentition. A curing light, by contrast, must direct a powerful, concentrated beam through a light guide onto a small treatment area so that the light-cured bonding material can polymerise.
A cordless curing light is also a compact device in which the light source, battery, electronics and light guide work intensively together. In professional use, the light may be switched on, used and recharged several times a day.
The load and construction therefore differ greatly from those of a whitening lamp. The expected lifespan of the two types of equipment cannot be compared one-to-one.
From basic models to high-end dental curing lights
Dental curing lights are available in very different quality and price ranges. There are relatively simple models for tooth gem artists, as well as high-end clinical systems that can cost many hundreds to well over a thousand euros.
A higher price does not automatically mean that such a light is necessary for tooth gems. For this application, it is especially important that the light functions reliably and is compatible with the bonding material being used.
Light output & compatibility
The light must deliver sufficient useful output within the wavelength range required by the photoinitiator system in the bonding material.
Build quality
The battery, electronics, LED, housing and light guide all contribute to how well a curing light withstands intensive professional use.
Stable performance
The output of a new curing light is not the only thing that matters. For professional use, it is especially important that the light continues to perform reliably throughout its service life.
Use & maintenance
Careful charging, cleaning, safe storage and protection against drops and high temperatures can help prevent premature problems.
The battery is a wear component
Cordless curing lights use a rechargeable battery. As with other devices, battery capacity gradually decreases after many charging cycles.
Over time, the light may run down more quickly, need charging more often or operate reliably for shorter periods. Eventually, replacement of the battery or the light itself may be necessary.
The light guide is an important and vulnerable component
The light is concentrated and directed towards the bonding material on the tooth through the light guide. Damage to the light guide can therefore affect the amount and distribution of light reaching the treatment area.
Light guides can be damaged if the curing light is dropped or knocked hard against something. Treat the light as professional precision equipment and place it somewhere safe during treatment.
Keep the end of the light guide clean
If the light guide touches uncured bonding material during curing, material can adhere to the tip and polymerise there.
If this happens repeatedly, a layer of cured material can build up. This can block part of the light. The curing light may still appear to work normally, while less useful light actually reaches the bonding material.
Visible blue light from a curing light does not automatically mean that the output reaching the treatment area is still optimal.
Protect a curing light from high temperatures
High temperatures can be harmful to the battery and electronics. Do not leave a curing light in direct sunlight for long periods, on a sunny windowsill or in a hot car.
Do you work outdoors, at events or festivals with tooth gems? Keep the curing light protected from direct sunlight and extreme heat.
When should a curing light be checked or replaced?
During professional use, watch for signs such as:
- The battery runs down noticeably quickly.
- The curing light no longer charges reliably.
- The light output appears to have decreased.
- The curing light switches off unexpectedly during use.
- The light guide is damaged.
- There are cured bonding residues on the light guide.
- The curing light becomes unusually warm.
- Its operation becomes inconsistent.
- Bonding material no longer seems to cure normally despite a correctly performed protocol.
If you are unsure about the performance of the curing light, checking or replacing it is more sensible than trying to compensate for potentially reduced output by simply curing for longer without knowing the cause.
A reliable curing light is part of the bonding protocol. Proper maintenance and timely replacement are therefore just as important as correct etching, isolation and bonding.
What aftercare should you give after placing a tooth gem?
Good aftercare mainly focuses on avoiding unnecessary mechanical loading and keeping the tooth and the margins around the tooth gem clean. The client does not need to treat the crystal as though the bonding still has to “dry”: correctly light-cured bonding material has already been polymerised during the curing step.
Even so, it is sensible not to subject a newly placed tooth gem to unnecessary heavy loading initially. Biting directly into hard foods, touching it repeatedly, playing with it or picking at the crystal can place extra force on the placement.
Good oral hygiene also remains important. A tooth gem sits on the tooth surface and creates additional margins where plaque can accumulate more easily if cleaning is inadequate.
Keep brushing the teeth properly
A tooth gem is not a reason to stop brushing the tooth concerned. Plaque should be removed carefully around the jewellery.
Brush normally but carefully, making sure the margins around the tooth gem are also cleaned.
Do not pick at the crystal
Do not repeatedly test whether the tooth gem is still secure with fingernails, fingers or other objects. Repeated pulling, pushing or levering can place unnecessary stress on the bonding.
Be careful with hard and chewy foods
Hard fruit, crusty bread rolls, sweets and other firm or chewy foods can place substantial force on a tooth gem when the jewellery is bitten on directly.
The main issue is mechanical loading. The client does not need to be afraid of eating normally, but should avoid deliberately biting hard foods with the tooth gem.
Continue cleaning between the teeth
Having a tooth gem does not change the importance of daily oral hygiene. Interdental spaces should continue to be cleaned according to normal oral-care advice.
If the tooth gem is close to a contact point or gum margin, cleanability deserves extra attention.
Do you need to wait 24 hours before brushing after placement?
With a correctly performed light-curing bonding protocol, the bonding material does not need to air-dry for hours. It is polymerised during treatment with the curing light.
There is therefore no need to avoid cleaning the tooth completely for a full day. It can, however, be sensible to be gentle immediately after placement and not scrub aggressively against the crystal with a hard toothbrush.
Always follow any additional aftercare instructions for the bonding material or bonding system being used. Product-specific manufacturer instructions remain authoritative.
Aftercare therefore does not mean: “do not touch anything for 24 hours because the glue still needs to dry”. It mainly means keeping the area clean and avoiding unnecessary mechanical loading.
Can you use an electric toothbrush with tooth gems?
In general, oral hygiene can also be continued with an electric toothbrush. The client does not need to skip the tooth with the tooth gem. What matters is careful brushing without deliberately pressing hard against or behind the jewellery.
Placement also matters here. A well-positioned and neatly finished tooth gem should be placed in a way that allows normal oral hygiene to continue.
What if plaque or food remains around the tooth gem?
Oral hygiene should then be improved. A tooth gem should never be a reason for plaque to remain on the tooth surface for prolonged periods.
If someone cannot clean around the jewellery properly, that is an important reason to reassess the situation. Long-term plaque accumulation around tooth jewellery is undesirable for both the tooth and the gums.
What should you do if a tooth gem comes loose?
A tooth gem can eventually come loose. Do not try to lever a partially loose piece of jewellery off the tooth yourself with sharp objects, and do not try to glue it back on at home.
Have the situation professionally assessed if bonding material remains on the tooth or if the jewellery is still partially attached.
Practical aftercare advice for the client:
- Keep the teeth and the margins around the tooth gem clean by brushing thoroughly.
- Prevent plaque from accumulating around the jewellery for prolonged periods.
- Do not pick, pull or lever at the tooth gem.
- Do not use fingernails or sharp objects to test the bond.
- Where possible, avoid biting hard foods directly on the jewellery.
- Continue cleaning between the teeth as normal.
- Do not use nail glue or superglue if a gem comes loose.
- Have remaining bonding material or a partially loose gem professionally assessed.
A tooth gem does not change the basic rule for a healthy mouth: plaque must still be removable. A design that cannot be kept clean is therefore not a good professional design.
How are tooth gems professionally removed?
A tooth gem that is still firmly attached should not be levered off the tooth with fingernails, tweezers, pliers or other objects. During active removal, both the jewellery and any remaining bonding material must be removed carefully from the tooth surface without unnecessarily damaging healthy enamel.
A tooth gem is bonded to the tooth surface with an adhesive bonding material. When the crystal is removed, bonding material may remain on the tooth.
Simply detaching the crystal is therefore not the same as completing the removal properly. The tooth surface should then be checked, and any remaining bonding material should be removed and finished appropriately.
Do not lever or pull it off yourself
Trying to pull a firmly bonded tooth gem off the tooth surface by force can place unnecessary stress on the enamel.
Do not use fingernails, tweezers, small pliers or sharp objects to remove a tooth gem at home.
Bonding residue may remain
After the jewellery has been removed, some bonding material may still be present on the tooth surface.
These residues should not be scraped away with knives, files or other uncontrolled tools.
Check the tooth surface
After removal, it is important to assess the tooth surface. This includes checking for bonding residue and whether the surface can be finished appropriately.
Finishing and polishing
After bonding material has been removed, the tooth surface may be finished and polished so that remaining adhesive and rough transition areas are removed as carefully as possible.
Who should remove a tooth gem?
If a tooth gem is still firmly attached and needs to be actively removed, we recommend having it assessed and removed by a dentist or dental hygienist .
These dental professionals can assess the tooth surface and have the knowledge and instruments needed to remove remaining material in a controlled way and, where necessary, finish or polish the surface.
For a tooth gem artist without dental authority, the key question is therefore not simply: “Can I get the crystal off?” What matters most is that the natural tooth surface is left in a responsible condition after removal.
What if a tooth gem comes off by itself?
A tooth gem may come off by itself over time. This does not automatically mean that all bonding material has disappeared from the tooth as well.
If the tooth surface feels smooth afterwards and there are no visible or palpable residues, the situation may be different from one in which a clear layer of bonding remains. If in doubt, assessment by a dental professional is advisable.
Can a tooth gem that has come off be reapplied?
A new placement should be treated as a new adhesive procedure. First check whether the tooth surface is suitable and whether any bonding residue remains.
Do not simply place new bonding material over old, unknown or uneven residues without first assessing and preparing the surface correctly.
Why shouldn’t you scrape bonding material off a tooth yourself?
Bonding material can be very similar in colour to tooth enamel. For someone without dental experience, it can therefore be difficult to identify exactly where the bonding ends and the natural enamel begins.
Uncontrolled filing, grinding or scraping therefore carries a risk of damaging not only the bonding material but also the tooth surface.
What should you advise a client about removal?
- Do not lever a firmly attached tooth gem off the tooth yourself.
- Do not use pliers, tweezers, fingernails or sharp objects.
- Do not file or grind bonding residue off the tooth surface yourself.
- Do not use household solvents or other chemicals.
- Have a firmly attached tooth gem professionally removed.
- Have remaining bonding material checked and removed if necessary.
- Have the tooth surface finished and polished after removal if needed.
The aim of professional removal is not simply to make the jewellery disappear. The aim is to remove both the tooth gem and the bonding material while preserving as much of the natural tooth surface as possible.
When is it better not to place a tooth gem?
Professional tooth gem placement is not only about knowing how to bond a crystal. You must also recognise when a tooth or oral situation does not appear suitable for a cosmetic treatment and when dental assessment should come first.
A tooth gem artist without dental authority does not make a diagnosis. You do not need to determine exactly what is wrong. You do, however, need to recognise deviations from a normal appearance and know when it is better not to treat.
If you are unsure about the health or condition of the tooth, enamel, gums or oral tissues, do not place a tooth gem until the situation has been assessed by an appropriate dental professional.
Toothache or unexplained sensitivity
Do not simply work on a tooth if the client has toothache, sudden sensitivity or other unexplained symptoms.
A cosmetic practitioner cannot determine the cause. Advise the client to consult a dentist first.
Possible caries or a damaged tooth
If you see a possible cavity, fracture, crack, damage or localised discolouration of uncertain cause, do not place a tooth gem over it.
The fact that an abnormality is small or painless does not automatically mean that the surface is suitable for bonding.
Damaged or abnormal enamel
A standard tooth gem protocol is intended for adhesive placement on suitable natural enamel.
If the surface is visibly damaged, severely worn, abnormal or questionable, do not treat it as though it were healthy enamel.
Unhealthy or irritated gums
Red, swollen, bleeding or clearly irritated gums require extra attention, especially if the desired tooth gem would be placed close to the gum line.
If you are unsure about oral health, postpone the cosmetic treatment.
Poor oral hygiene
A tooth gem creates additional margins on the tooth surface where plaque can accumulate more easily.
If someone already has a lot of visible plaque or is unable to keep the teeth adequately clean, it is sensible to improve oral hygiene before placing a tooth gem.
Unfavourable bite or heavy mechanical loading
A tooth gem should not be placed where an opposing tooth repeatedly comes into direct contact with it.
Extra care is also needed when there is heavy tooth grinding, clenching or other obvious mechanical loading.
Crowns, veneers and composite
These materials have different surface properties from natural enamel. A standard etch, primer and bonding protocol for enamel should therefore not automatically be applied to restorative materials.
For a tooth gem artist without specific dental knowledge, suitable natural enamel is the safest basis for a standard placement protocol.
Braces or other orthodontic appliances
Brackets, retainers and other orthodontic appliances can change the available space, cleanability and mechanical loading.
If the tooth gem could interfere with orthodontic treatment or will be difficult to keep clean, it is sensible to consult the treating dentist or orthodontist.
Allergy or previous reaction to materials
Ask about known allergies or previous adverse reactions to dental materials or products used during treatment.
If it is unclear whether a product is suitable, check the composition and product information before treatment.
Abnormalities of the oral mucosa or other concerns
If you see sores, swelling, unusual patches or other changes in or around the mouth whose cause you do not know, do not make your own diagnosis.
Do not treat through uncertainty; advise professional assessment first when appropriate.
A white spot on a tooth is not automatically only cosmetic
White, brown or locally abnormal areas can have different causes. Sometimes a discolouration is harmless, but appearance alone does not always tell a tooth gem artist exactly what is going on.
Do not deliberately place a tooth gem over a noticeable area simply to hide it when it is unclear whether the tooth surface is healthy and suitable.
Oral hygiene is part of client selection
A professional design must remain cleanable. Large clusters, several crystals placed close together or a placement near the gum line may require more attention during brushing.
This does not mean that more elaborate designs are automatically unsuitable. The tooth gem artist should allow enough space for cleaning, and the client must be willing and able to keep the area clean.
A tooth gem design is not judged on appearance alone. Cleanability, position, bite and the condition of the tooth surface are also part of professional design mapping.
Screening is different from diagnosing
During the intake, a cosmetic tooth gem artist can look at whether the teeth, gums and oral tissues appear normal and suitable for treatment. That is screening and selection.
Determining whether someone has caries, an enamel abnormality, gum disease or another dental condition is different. That requires dental assessment.
If there is doubt, the professional choice is not to guess what the cause probably is, but to postpone treatment and refer the client to an appropriate dental professional.
Do not treat, or arrange assessment first, in situations including:
- unexplained toothache or marked sensitivity;
- possible caries, fractures or damage;
- doubt about the condition of the enamel;
- clearly irritated or unhealthy gums;
- poor oral hygiene or a lot of plaque;
- an unfavourable bite or heavy mechanical loading;
- uncertainty about crowns, veneers or composite;
- orthodontic appliances that may affect placement;
- known allergies or previous reactions to the materials used;
- abnormalities in or around the mouth that should be assessed first.
Professional tooth gem placement also means being able to decide not to treat. If there is doubt about oral health or the tooth surface, assessment comes before cosmetics.
How do you work hygienically and safely with tooth gems?
Professional tooth gem placement is not only about correct bonding, but also about preventing cross-contamination. Work with clean hands, suitable gloves, an organised work area, single-use applicators where intended, and correctly cleaned, disinfected or sterilised reusable instruments.
During a tooth gem treatment, you work directly in and around the mouth. Materials and instruments may therefore come into contact with saliva, mucous membranes and potentially other body fluids.
A consistent hygiene routine reduces the risk of microorganisms being transferred from one client to another via hands, materials, surfaces or instruments.
Hand hygiene before and after every client
Clean or disinfect your hands before every treatment and before putting on gloves. Perform hand hygiene again after removing the gloves.
Gloves do not replace hand hygiene.
New gloves for every client
Use a new pair of suitable examination gloves for every client. Gloves are not washed, disinfected or reused.
If gloves become damaged or heavily contaminated during treatment, replace them.
Touch as few other surfaces as possible
After working in the mouth with used gloves, avoid unnecessarily touching your phone, drawer handles, door handles, product packaging or other clean surfaces.
Prepare what you need in advance so that you do not have to keep switching between clean and potentially contaminated items during treatment.
Protect eyes and clothing where appropriate
Where there is a risk of splashes or contact with saliva or chemical products, use appropriate personal protective equipment.
Depending on the treatment and product being used, this may include gloves, suitable protective clothing and eye protection.
Single-use means one client, one treatment
Items intended for single use are not cleaned and then reused on another client.
With tooth gems, this often includes small applicators such as microbrushes, disposable brushes, gauze and other aids that may come into contact with the client or treatment area.
A single-use applicator is used for one client and then discarded, even if it still looks clean.
Prevent contamination of product packaging
Work in a way that keeps the contents and openings of bottles, tubes and other packaging clean. A used microbrush or applicator that has already been in or around the mouth should never be returned to a product container.
Where possible, dispense the required amount of material in advance or use a method in which the product is applied directly to a clean disposable applicator without touching the packaging with used materials.
Microbrushes: a small tool that makes a big difference
Microbrushes are used during a bonding protocol to apply small amounts of product in a controlled way. Because different steps use different materials, cross-contamination between products should be prevented.
Use a clean applicator for each product step and do not place used microbrushes back among unused materials.
An applicator that has been used with Primer should not then be used to take another product directly from its original packaging. This helps prevent cross-contamination between materials.
Work with clearly separated clean and used zones
An organised work area helps prevent cross-contamination. Before treatment, distinguish between items that are still clean and items that have been used during the procedure.
Clean zone
This is where unused instruments, tooth gems, microbrushes, materials and other supplies that have not yet come into contact with the client are kept.
Used zone
This is where you place used instruments and other materials that may have come into contact with saliva, gloves or the treatment area.
These items do not return to the clean zone until they have been processed according to the appropriate protocol.
Reusable instruments must be processed correctly
Not every instrument is disposable. Reusable instruments must be cleaned between clients and then processed according to their intended use and the manufacturer’s instructions.
Reusable instruments that come into contact with oral mucosa must be correctly cleaned and processed between clients according to their intended use and the manufacturer’s instructions. Heat-resistant instruments suitable for sterilisation are sterilised according to an appropriate protocol. If an instrument cannot be safely reprocessed, use a suitable disposable or reprocessable alternative.
Wiping an instrument with surface disinfectant is not automatically sufficient to make it suitable for use on the next client.
Clean and disinfect the work surface between clients
Worktops, treatment surfaces and other touch points can become indirectly contaminated during a treatment via gloves or used materials.
Clean and disinfect relevant contact surfaces between clients according to the instructions for the cleaning or disinfecting product being used. Pay particular attention to surfaces that are frequently touched during treatment.
Etch is not an innocuous beauty product
Dental etch is designed to prepare the tooth surface in a controlled way for adhesive bonding. It should only be applied to the intended tooth surface.
Avoid unnecessary contact with gums, oral mucosa, skin and eyes, and work precisely according to the instructions for the specific product.
Never extend the etching time or enlarge the treatment area on your own initiative in the belief that this will automatically improve adhesion. More etching is not automatically better.
Saliva contamination during the bonding process
A tooth gem treatment takes place in a moist environment. Isolation is therefore one of the most important practical aspects of the technique.
If the prepared tooth surface comes into contact with saliva again during a critical bonding step, do not automatically continue to the next step. First restore a clean, dry working field and follow the instructions for the bonding system when re-preparing the surface.
Spending a few extra seconds re-isolating is better than continuing a complete bonding protocol on a contaminated surface.
Keep the tooth gems themselves clean as well
If a crystal lands on a contaminated surface, on the floor or among used instruments before placement, do not simply place it on the tooth anyway.
Store tooth gems closed and organised, and pick them up during treatment with a suitable clean pick-up tool or applicator.
Basic rules for hygienic tooth gem placement:
- Perform hand hygiene before and after every client.
- Use new gloves for every treatment.
- Use single-use materials only once.
- Use a clean applicator for each product step.
- Never return used applicators to product packaging.
- Keep clean and used materials separate.
- Process reusable instruments according to the appropriate cleaning and sterilisation protocol.
- Clean and disinfect relevant work surfaces between clients.
- Prevent etch from contacting unintended oral tissues, skin and eyes.
- Prevent saliva contamination during the bonding steps.
- Always follow the instructions for use of the products and equipment being used.
Professional hygiene should be part of the entire workflow: before the client sits down, during every bonding step and after the treatment is complete.
Learning to place tooth gems professionally
Tooth gem placement may look simple at first, but reliable and neat placement requires more than knowing where to put a crystal. You need to understand why every step in the bonding protocol matters and what to do when the practical situation differs from the ideal.
That is why the X-treme Smile® course covers not only placement itself, but also intake, the tooth surface, isolation, material use, curing, hygiene, aftercare and recognising situations in which it is better not to treat.
A good tooth gem artist can do more than position a crystal attractively. They also understand why bonding may or may not adhere, when re-isolation is required and when a tooth should first be assessed by a dental professional.
The theory behind the technique
You learn how an adhesive bonding protocol is structured and why cleaning, etching, primer, bonding, isolation and curing each have their own function.
Understanding the technique helps you recognise practical problems more effectively than simply memorising a fixed step-by-step procedure.
Practical placement
Alongside theory, tooth gems are of course about practical skill: isolating the tooth surface, working in a controlled way with small amounts of material, and positioning and finishing the crystal accurately.
Intake & selection
You learn to assess the tooth surface, gums, bite, placement, oral hygiene and other factors that may influence treatment.
You also learn the difference between screening and diagnosing, and when referral to a dental professional is appropriate.
Learning to prevent problems
Many problems are caused not by the crystal itself, but by factors such as moisture contamination, incorrect product sequence, poor positioning, insufficient curing or unfavourable mechanical loading after treatment.
Professional training helps you recognise these causes during treatment and prevent them as far as possible.
Learn online or attend live practical training
The basic Tooth Gem Course can be taken online with X-treme Smile®. This allows students to work through the theory and demonstrations at their own pace.
The online course also includes assessment of a practical placement. The student submits a clear close-up video showing the placement of a crystal on a model. This means we assess not only whether the theory has been completed, but also how the technique is performed in practice.
For those who prefer to practise with direct guidance, live training in Joure is also available.
The certificate is therefore not based solely on completing the theory: for the basic course, we also want to see that the practical placement is carried out carefully.
No specific previous training required
No specific dental or beauty qualification is required to take the basic Tooth Gem Course.
However, this does not automatically mean that every procedure may be carried out without restriction in every country. Laws and regulations relating to cosmetic treatments, dental materials and professional scope of practice vary by country.
Anyone wishing to work professionally with tooth gems remains responsible for the rules that apply in the country where the treatments are offered.
From basic technique to advanced designs
A strong basic placement technique is the foundation for more elaborate designs. Once isolation, bonding, positioning and finishing are well controlled, more complex combinations of crystals and shapes can be created.
Within the X-treme Smile® Academy, we are therefore developing advanced Tooth Gems Masterclasses alongside the basic course, including techniques for Tooth Fairy Dust, Butterfly Tooth Gems and other advanced designs.
This creates a clear learning pathway: basic placement → masterclasses → advanced tooth gem artist.
Support does not stop after the course
Many practical questions only arise once you start treating clients independently. A crystal that sits differently than expected, difficult isolation, uncertainty about a tooth surface or bonding that behaves differently: this is exactly when practical support is valuable.
That is why students can continue to contact X-treme Smile® after the course with practical questions about tooth gems, materials and treatment situations.
Tooth Gem Course for Professionals
Learn professional tooth gem placement step by step: from intake, tooth surface and bonding to positioning, curing, hygiene, aftercare and practical assessment.
The course combines theory with practical application and forms the basis for further development within the X-treme Smile® Academy.
View the Tooth Gem CourseProfessional products for tooth gems
A professional tooth gem treatment requires more than the crystal itself. Placement quality depends on the combination of suitable tooth gems, bonding materials, applicators, isolation and a reliable dental curing light.
Tooth gems & crystals
Choose from professional tooth gems in different materials, colours, sizes and shapes for individual placements and more elaborate designs.
View tooth gems & crystals →Bonding & tools
Professional materials for preparation, bonding, positioning and curing, including etch, primer, glue, microbrushes, pick-up tools and curing lights.
View bonding & tools →Starter kits
Complete starter kits for professionals who want to begin working with tooth gems and start immediately with a suitable system.
View starter kits →Knowledge based on a dental background and practical experience
Professional tooth gem placement requires more than a feel for design. You work on a tooth surface, with adhesive materials and in an environment where isolation, hygiene, material use and curing must be carried out precisely.
At X-treme Smile®, we combine many years of practical experience with educational backgrounds in dental assisting, dental technology and dental hygiene.
As a result, when we look at tooth gems, we consider not only the final appearance but also the tooth surface, bonding technique, cleanability, position on the tooth, bite-related loading, hygiene and the professional boundaries of a cosmetic treatment.
This combination forms the basis of our courses, treatment protocols, product knowledge and the professional information in this knowledge base.
- Dental educational background
- Practical experience with tooth gems and bonding techniques
- Knowledge of dental adhesive materials
- Training and support for tooth gem professionals
- Practice-based knowledge of isolation, curing and aftercare
- Personal support after the course
Professional basis
This information is based on our own practical and educational experience, instructions for use of professional dental materials and relevant professional guidance on oral hygiene, infection prevention and light curing.
Product-specific manufacturer instructions always remain authoritative. If there is doubt about the health or condition of the teeth, gums or oral tissues, assessment by an appropriate dental professional is advised first.